概述
Node.js是一个Javascript运行环境(runtime)。nodejs不是一门新的编程语言,nodejs是在服务端运行javascript的运行环境,编程语言还是javascript. 它是对Google V8引擎进行的封装。V8擎执行Javascript的速度非常快,性能非常好。Node.js对一些特殊用例进行了优化,提供了替代的API,使得V8在非浏览器环境下运行得更好。
Node.js是一个基于Chrome JavaScript运行时建立的平台, 用于方便地搭建响应速度快、易于扩展的网络应用。Node.js 使用事件驱动, 非阻塞I/O 模型而得以轻量和高效,非常适合在分布式设备上运行数据密集型的实时应用。
简单归纳:
node.js包含的内容:
1. 有一个V8引擎 用来解析我们写好的js代码
2. 还有一些常用的模块 path fs http…
node官方团队发现有很多的功能代码人们都在频繁的使用,于是这将些相同的代码封装成了对应的模块
然后编译成二进制文件封装到node.js安装包中
3. 第三方模块
还有一些常用的功能或许没有来得及封装 别人将它封装好了存在了node第三方托管平台
模块
在Node中,模块分为两类: 一类是Node提供的模块,称为核心模块;另一类是用户编写的模块,称为文件模块。
CommonJs就是模块化的标准, nodejs 就是CommonJS(模块化)的实现。
我们可以把公共的功能抽离成为一个单独的js文件作为一个模块,默认情况下,这个模块里面的所有方法和属性是private的,需要使用exports或module.exports暴露. 在需要使用这个模块时,通过require的方式引入。
tools.js:
1
2
3
4
function ConsoleOutput(msg){
    console.log(msg);
}
exports.ConsoleOutput = ConsoleOutput;
app.js:
1
2
const log = require('./tool.js')
log.ConsoleOutput("Hello nodejs");
nodejs默认会找node_modules文件夹下对应模块里的index.js
常用核心模块:
http
http模块可以用来创建服务器
1
2
3
4
5
6
7
var http = require('http');
http.createServer(function (request, response) {
    response.writeHead(200, {'Content-Type': 'text/plain'});
    response.end('Hello World');
}).listen(8081);

console.log('Server running at http://127.0.0.1:8081/');
解析参数
1
2
3
4
5
6
const url = require('url')

if(req.url != '/favicon.ico'){
    var userInfo = url.parse(req.url, true).query;
    console.log(`姓名: ${userInfo.name} -- 年龄: ${userInfo.age}`);
}
fs
在nodejs中,提供了fs模块,这是node的核心模块
-
fs.stat检测路径是文件还是目录1 2 3 4 5 6 7 8 9 10
const fs = require("fs"); fs.stat('tool.js', (err, data)=>{ if(err){ console.log(err); return; } console.log(data.isFile()); console.log(data.isDirectory()); }) -
fs.mkdir1 2 3 4 5 6 7
fs.mkdir('./css', (err)=> { if(err){ console.log(err); return; } console.log('create succeed'); }) -
fs.writeFile创建写入或覆盖文件1 2 3 4
fs.writeFile("2.txt", "hello world!", err=>{ if(err) return console.log("写入文件失败", err); console.log("写入文件成功"); }); fs.appendFile创建写入或追加文件-
fs.readFile1 2 3 4 5 6 7 8 9 10 11 12 13
fs.readFile('./tool.js', (err, data) =>{ if(err){ console.log(err); return; } console.log(data.toString()); //把Buffer转换成string类型 }) fs.readFile("data.txt", "utf-8",(err, data)=>{ console.log(err); console.log(err.message) //message是error对象的一个属性 存储错误信息 console.log(data); }); fs.readdir读取目录fs.rename重命名, 移动文件fs.rmdir删除目录fs.unlink删除文件
注意:
fs返回的data都是异步的,不能使用for循环去遍历。
Path 模块
-
path.join拼接路径1
path.join("abc","def","gg", "index.html") -
path.dirname(path)返回路径的目录名
使用第三方模块
NPM是随同NodeJS一起安装的包管理工具,能解决NodeJS代码部署上的很多问题,常见的使用场景有以下几种:
允许用户从NPM服务器下载别人编写的第三方包到本地使用。
允许用户将自己编写的包或命令行程序上传到NPM服务器供别人使用。
初始化package.json:
1
npm init --yes
npm 安装 Node.js 模块:
1
npm install <Module Name>
安装指定版本npm install modules@1.0.0
^表示第一位版本号不变,后面两位取最新的
~表示前两位不变,最后一个取最新
*表示全部取最新
常用模块:
supervisor
supervisor 会实时监测你应用下的所有文件,发现有文件修改,就重新载入程序文件这样就实现了部署。 修改了程序文件后马上就能看到变更后的结果。
-
首先安装supervisor
1
 npm install -g supervisor
-
使用supervisor 代替 node 命令启动应用
1
 supervisor app.js
Helmet
Helmet是一个能够帮助增强Node.JS之Express/Connect等Javascript Web应用安全的中间件。使用Helmet能帮助你的应用避免对Web攻击有XSS跨站脚本, 脚本注入 clickjacking 以及各种非安全的请求等对Node.js的Web应用构成各种威胁。
安装Helmet:
1
npm install helmet --save;
在Express使用Helmet:
1
2
3
4
5
6
const express = require("express");
const helmet = require("helmet");

const app = express();

app.use(helmet());
Helmet 默认设置以下headers:
1
2
3
4
5
6
7
8
9
10
11
12
13
Content-Security-Policy: default-src 'self';base-uri 'self';font-src 'self' https: data:;form-action 'self';frame-ancestors 'self';img-src 'self' data:;object-src 'none';script-src 'self';script-src-attr 'none';style-src 'self' https: 'unsafe-inline';upgrade-insecure-requests
Cross-Origin-Embedder-Policy: require-corp
Cross-Origin-Opener-Policy: same-origin
Cross-Origin-Resource-Policy: same-origin
Origin-Agent-Cluster: ?1
Referrer-Policy: no-referrer
Strict-Transport-Security: max-age=15552000; includeSubDomains
X-Content-Type-Options: nosniff
X-DNS-Prefetch-Control: off
X-Download-Options: noopen
X-Frame-Options: SAMEORIGIN
X-Permitted-Cross-Domain-Policies: none
X-XSS-Protection: 0
也可以对配置进行定制:
1
2
3
4
5
app.use(
    helmet({
        referrerPolicy: { policy: "no-referrer" },
    })
);
Reference:
HELMET official
compression
compression用于压缩,对网络传输进行优化。 安装:
1
npm install compression --save
使用:
1
2
3
4
5
6
7
var compression = require('compression')
var express = require('express')

var app = express()

// compress all responses
app.use(compression())
Reference:
Compression github
body-parser
用于解析request的body
安装
1
npm install body-parser
使用
1
2
3
var bodyParser = require('body-parser')
app.use(bodyParser.json)
app.use(bodyParser.urlencoded({extended:false}))
bodyParser.json
返回仅解析json并仅查看Content-Type标头与type选项匹配的请求的中间件。
bodyParser.urlencoded
返回仅解析urlencoded正文且仅查看Content-Type标头与type选项匹配的请求的中间件。
body-parser npm
body-parser npm
Express
介绍
Express 是一个简洁而灵活的 node.js Web应用框架, 提供一系列强大特性帮助你创建各种Web应用。Express 不对 node.js 已有的特性进行二次抽象,我们只是在它之上扩展了Web应用所需的功能。丰富的HTTP工具以及来自Connect框架的中间件随取随用,创建强健、友好的API变得快速又简单。
Express 框架核心特性:
- 可以设置中间件来响应 HTTP 请求。
- 定义了路由表用于执行不同的 HTTP 请求动作。
- 可以通过向模板传递参数来动态渲染 HTML 页面。
安装Express
Express 需要提前安装Node.js,创建目录以保存应用程序,并将其设置为工作目录。
1
2
3
4
5
6
7
8
9
10
11
12
mkdir expressDemo
cd expressDemo

npm init -y  //以默认值初始化一个package.json
npm i @types/node --save

npm install express --save
npm install @types/express --save

npm install -g nodemon  //监视代码改动

nodemon build/auction_server  //用nodemon启动服务
npm install ws –save npm install @types/ws –save-dev
Hello World
在 expressDemo 目录中,创建名为 index.js 的文件,然后添加以下代码:
1
2
3
4
5
6
7
8
9
10
11
const express = require('express')
const app = express()
const port = 3000

app.get('/', (req, res) => {
    res.send('Hello World!')
})

app.listen(port, () => {
    console.log(`Example app listening on port ${port}`)
})
应用程序会启动服务器,并在端口 3000 上侦听连接。此应用程序以“Hello World!”响应针对根 URL (/) 或路由的请求。
这里我们可以跟之前通过引入http模块来创建服务的代码比较一下:
1
2
3
4
5
6
7
var http = require('http');
http.createServer(function (request, response) {
    response.writeHead(200, {'Content-Type': 'text/plain'});
    response.end('Hello World');
}).listen(8081);

console.log('Server running at http://127.0.0.1:8081/');
使用以下命令运行应用程序:
1
node index.js
然后,在浏览器中输入 http://localhost:3000/ 以查看输出。
也可以使用Express generator来快速创建一个应用程序框架.
Express 应用程序生成器
路由
路由用于确定应用程序如何响应对特定端点的客户机请求,包含一个 URI(或路径)和一个特定的 HTTP 请求方法(GET、POST 等)。 每个路由可以具有一个或多个处理程序函数,这些函数在路由匹配时执行。
路由定义采用以下结构:
1
app.METHOD(PATH, HANDLER)
app 是 express 的实例。METHOD 是 HTTP 请求方法。PATH 是服务器上的路径。 HANDLER 是在路由匹配时执行的函数。
在HelloWorld示例中:
1
2
3
app.get('/', function (req, res) {
    res.send('Hello World!');
});
在根路由 (/) 上对 POST 请求进行响应:
1
2
3
app.post('/', function (req, res) {
    res.send('Got a POST request');
});
Express 支持对应于 HTTP 方法的以下路由方法:get、post、put、head、delete、options、trace、copy、lock、mkcol、move、purge、propfind、proppatch、unlock、report、mkactivity、checkout、merge、m-search、notify、subscribe、unsubscribe、patch、search 和 connect。
有一种特殊路由方法:app.all(),它并非派生自 HTTP 方法。该方法用于在所有请求方法的路径中装入中间件函数。
在以下示例中,无论您使用 GET、POST、PUT、DELETE 还是在 http 模块中支持的其他任何 HTTP 请求方法,都将为针对“/secret”的请求执行处理程序。
1
2
3
4
app.all('/secret', function (req, res, next) {
    console.log('Accessing the secret section ...');
    next(); // pass control to the next handler
});
路由处理程序
可以提供多个回调函数,以类似于中间件的行为方式来处理请求。唯一例外是这些回调函数可能调用 next(‘route’) 来绕过剩余的路由回调。您可以使用此机制对路由施加先决条件,在没有理由继续执行当前路由的情况下,可将控制权传递给后续路由。
路由处理程序的形式可以是一个函数、一组函数或者两者的结合,如以下示例中所示。
单个回调函数
1
2
3
app.get('/example/a', function (req, res) {
    res.send('Hello from A!');
});
多个回调函数
1
2
3
4
5
6
app.get('/example/b', function (req, res, next) {
    console.log('the response will be sent by the next function ...');
    next();
}, function (req, res) {
    res.send('Hello from B!');
});
一组回调函数
1
2
3
4
5
6
7
8
9
10
11
12
13
14
15
var cb0 = function (req, res, next) {
    console.log('CB0');
    next();
}

var cb1 = function (req, res, next) {
    console.log('CB1');
    next();
}

var cb2 = function (req, res) {
    res.send('Hello from C!');
}

app.get('/example/c', [cb0, cb1, cb2]);
路由处理程序使您可以为一个路径定义多个路由。以下示例为针对 /user/:id 路径的 GET 请求定义两个路由。第二个路由不会导致任何问题,但是永远都不会被调用,因为第一个路由结束了请求/响应循环。
1
2
3
4
5
6
7
8
9
10
11
app.get('/user/:id', function (req, res, next) {
    console.log('ID:', req.params.id);
    next();
}, function (req, res, next) {
    res.send('User Info');
});

// handler for the /user/:id path, which prints the user ID
app.get('/user/:id', function (req, res, next) {
    res.end(req.params.id);
});
要跳过路由器中间件堆栈中剩余的中间件函数,请调用 next('route') 将控制权传递给下一个路由。 注:next('route') 仅在使用 app.METHOD() 或 router.METHOD() 函数装入的中间件函数中有效。
1
2
3
4
5
6
7
8
9
10
11
12
13
14
15
app.get('/user/:id', function (req, res, next) {

        if (req.params.id == 0) {
            next('route');      // if the user ID is 0, skip to the next route
        } else {
            next();             // otherwise pass the control to the next middleware function in this stack
        }
    }, function (req, res, next) {
        res.render('regular');  // render a regular page
});

// handler for the /user/:id path, which renders a special page
app.get('/user/:id', function (req, res, next) {
    res.render('special');
});
app.route()
可以使用 app.route() 为路由路径创建可链接的路由处理程序。 因为在单一位置指定路径,所以可以减少冗余和输入错误。
以下是使用 app.route() 定义的链式路由处理程序的示例。
1
2
3
4
5
6
7
8
9
10
app.route('/book')
    .get(function(req, res) {
        res.send('Get a random book');
    })
    .post(function(req, res) {
        res.send('Add a book');
    })
    .put(function(req, res) {
        res.send('Update the book');
    });
express.Router
使用 express.Router 类来创建可安装的模块化路由处理程序。Router 实例是完整的中间件和路由系统;因此,常常将其称为“微型应用程序”。
以下示例将路由器创建为模块,在其中装入中间件,定义一些路由,然后安装在主应用程序的路径中。
在应用程序目录中创建名为 birds.js 的路由器文件,其中包含以下内容:
1
2
3
4
5
6
7
8
9
10
11
12
13
14
15
16
17
18
var express = require('express');
var router = express.Router();

// middleware that is specific to this router
router.use(function timeLog(req, res, next) {
    console.log('Time: ', Date.now());
    next();
});
// define the home page route
router.get('/', function(req, res) {
    res.send('Birds home page');
});
// define the about route
router.get('/about', function(req, res) {
    res.send('About birds');
});

module.exports = router;
接着,在应用程序中装入路由器模块:
1
2
3
var birds = require('./birds');
...
app.use('/birds', birds);
此应用程序现在可处理针对 /birds 和 /birds/about 的请求,调用特定于此路由的 timeLog 中间件函数。
中间件 middleware
Express 是一个路由和中间件 Web 框架,其自身只具有最低程度的功能:Express 应用程序基本上是一系列中间件函数调用。
中间件函数能够访问请求对象 (req)、响应对象 (res) 以及应用程序的请求/响应循环中的下一个中间件函数。下一个中间件函数通常由名为 next 的变量来表示。
中间件函数可以执行以下任务:
- 执行任何代码。
- 对请求和响应对象进行更改。
- 结束请求/响应循环。
- 调用堆栈中的下一个中间件。
如果当前中间件函数没有结束请求/响应循环,那么它必须调用 next(),以将控制权传递给下一个中间件函数。否则,请求将保持挂起状态。
Express 应用程序可以使用以下类型的中间件:
1
2
3
4
5
应用层中间件
路由器层中间件
错误处理中间件
内置中间件
第三方中间件
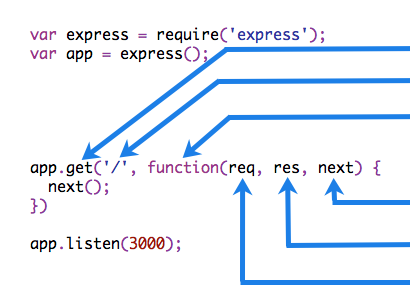
以下是我们之前写的“Hello World”Express 应用程序
1
2
3
4
5
6
7
8
var express = require('express');
var app = express();

app.get('/', function (req, res) {
    res.send('Hello World!');
});

app.listen(3000);
以下是称为“myLogger”的中间件函数的简单示例
1
2
3
4
5
6
7
8
9
10
11
12
13
14
15
var express = require('express');
var app = express();

var myLogger = function (req, res, next) {
    console.log('LOGGED');
    next();
};

app.use(myLogger);

app.get('/', function (req, res) {
    res.send('Hello World!');
});

app.listen(3000);
应用程序每次收到请求时,会在终端上显示消息“LOGGED”。
中间件装入顺序很重要:首先装入的中间件函数也首先被执行。如果在根路径的路由之后装入 myLogger,那么请求永远都不会到达该函数,应用程序也不会显示“LOGGED”,因为根路径的路由处理程序终止了请求/响应循环。
下一个示例将名为 requestTime 的属性添加到请求对象。我们将此中间件函数命名为“requestTime”。
1
2
3
4
5
6
7
8
9
10
11
12
13
14
15
16
17
18
19
20
21
22
const express = require('express')
const app = express()
const port = 3000
var birds = require('./birds');

var myLogger = function(req, res, next){
    console.log('LOGGED');
    next();
}
var requestTime = function(req, res, next){
    req.requestTime = Date.now();
    next();
}

app.use(myLogger);
app.use(requestTime);

app.get('/', (req, res) => {
    var responseText = 'Hello World!';
    responseText += 'Requested at: ' + req.requestTime + '';
    res.send(responseText)
})
路由器层中间件
路由器层中间件的工作方式与应用层中间件基本相同,差异之处在于它绑定到 express.Router() 的实例。
使用 router.use() 和 router.METHOD() 函数装入路由器层中间件。
1
2
3
4
5
6
7
8
9
10
11
12
13
14
15
16
17
18
19
20
21
22
23
24
25
26
27
28
29
30
31
32
33
34
35
36
37
var app = express();
var router = express.Router();

// a middleware function with no mount path. This code is executed for every request to the router
router.use(function (req, res, next) {
    console.log('Time:', Date.now());
    next();
});

// a middleware sub-stack shows request info for any type of HTTP request to the /user/:id path
router.use('/user/:id', function(req, res, next) {
    console.log('Request URL:', req.originalUrl);
    next();
}, function (req, res, next) {
    console.log('Request Type:', req.method);
next();
});

// a middleware sub-stack that handles GET requests to the /user/:id path
router.get('/user/:id', function (req, res, next) {
    // if the user ID is 0, skip to the next router
    if (req.params.id == 0) next('route');
    // otherwise pass control to the next middleware function in this stack
    else next(); //
}, function (req, res, next) {
    // render a regular page
    res.render('regular');
});

// handler for the /user/:id path, which renders a special page
router.get('/user/:id', function (req, res, next) {
    console.log(req.params.id);
    res.render('special');
});

// mount the router on the app
app.use('/', router);
为了方便对路由进行模块化的管理,Express 不建议将路由直接挂载到 app 上,而是推荐将路由抽离为单独的模块。
将路由抽离为单独模块的步骤如下:
- 创建路由模块对应的 .js 文件 router.js
- 调用 express.Router() 函数创建路由对象
- 向路由对象上挂载具体的路由
- 使用 module.exports 向外共享路由对象
- 使用 app.use() 函数注册路由模块
错误处理中间件
错误处理中间件函数的定义方式与其他中间件函数基本相同,差别在于错误处理函数有四个自变量而不是三个,专门具有特征符 (err, req, res, next):
1
2
3
4
app.use(function(err, req, res, next) {
    console.error(err.stack);
    res.status(500).send('Something broke!');
});
请在其他 app.use() 和路由调用之后,最后定义错误处理中间件
内置中间件
express.static(root, [options])
Express 中唯一内置的中间件函数是 express.static。此函数基于 serve-static,负责提供 Express 应用程序的静态资源。
root 自变量指定从其中提供静态资源的根目录。
1
app.use(express.static('public', options));
第三方中间件
使用第三方中间件向 Express 应用程序添加功能。
安装具有所需功能的 Node.js 模块,然后在应用层或路由器层的应用程序中将其加装入。
1
2
3
4
5
6
7
8
npm install cookie-parser

var express = require('express');
var app = express();
var cookieParser = require('cookie-parser');

// load the cookie-parsing middleware
app.use(cookieParser());
静态文件
为了提供诸如图像、CSS 文件和 JavaScript 文件之类的静态文件,请使用 Express 中的 express.static 内置中间件函数。
将包含静态资源的目录的名称传递给 express.static 中间件函数,以便开始直接提供这些文件。
1
app.use(express.static('public'));
要使用多个静态资源目录,请多次调用 express.static 中间件函数:
1
2
app.use(express.static('public'));
app.use(express.static('files'));
Express 以使用 express.static 中间件函数设置静态目录的顺序来查找文件。
要为 express.static 函数提供的文件创建虚拟路径前缀(路径并不实际存在于文件系统中),请为静态目录指定安装路径,如下所示:
1
app.use('/static', express.static('public'));
404与错误处理
在 Express 中,404 响应不是错误的结果,所以错误处理程序中间件不会将其捕获。此行为是因为 404 响应只是表明缺少要执行的其他工作;换言之,Express 执行了所有中间件函数和路由,且发现它们都没有响应。您需要做的只是在堆栈的最底部(在其他所有函数之下)添加一个中间件函数来处理 404 响应:
1
2
3
app.use(function(req, res, next) {
    res.status(404).send('Sorry cant find that!');
});
错误处理中间件的定义方式与其他中间件基本相同,差别在于错误处理中间件有四个自变量而不是三个,专门具有特征符 (err, req, res, next):
1
2
3
4
app.use(function(err, req, res, next) {
    console.error(err.stack);
    res.status(500).send('Something broke!');
});
完整实例
- 创建一个folder expressDemo
- 使用VSCode打开,初始化
npm init -y - 安装Express
npm install express - 新建文件
index.js -
在index.js中,初始化express
1 2 3 4 5 6 7
const express = require('express') const app = express(); const port = 3000; app.listen(port,()=> { console.log(`Express app is listening on port ${port}`); }) -
添加router.js
1 2 3 4 5 6 7 8 9 10 11 12 13 14 15 16 17 18 19 20 21 22
const express = require('express'); var router = express.Router(); router.use(function(req, res, next){ console.log('Time: ', Date.now()); next(); }) router.get('/', (req, res)=>{ res.send('Hello World'); }) // Error handling router.use(function(req, res, next){ res.status(404).send('Sorry cant find that!'); }) router.use(function(err, req, res, next) { console.error(err.stack); res.status(500).send('Something broke!'); }); module.exports = router; -
修改index.js,引入router
1 2 3 4 5 6 7 8 9 10
const express = require('express') const app = express(); var router = require('./router') const port = 3000; app.use(router); app.listen(port,()=> { console.log(`Express app is listening on port ${port}`); }) -
添加logger.js中间件
1 2 3 4 5 6
module.exports = { log: function(req, res, next){ console.log("console log from middleware..."); next(); } } -
修改index.js引入中间件
1
2
3
4
5
6
7
8
9
10
11
12
13
 const express = require('express')
 var router = require('./router')
 const consoleLogger = require('./logger.js')

 const app = express();
 const port = 3000;

 app.use(consoleLogger.log);
 app.use(router);

 app.listen(port,()=> {
     console.log(`Express app is listening on port ${port}`);
 })
Nodejs C++ Addon
Node.js 调用C++方法,其实是调用 C++ 代码生成的动态库,可以使用require() 函数加载到Node.js中,就像使用普通的Node.js模块一样。
实现Addon插件有三种选择:Node-API、nan,或直接使用内部 V8、libuv 和 Node.js 库。除非需要直接访问 Node-API 未暴露的功能,否则请使用 Node-API。
不使用 Node-API 时,实现插件很复杂,涉及若干组件和 API 的知识:
- V8:Node.js 用来提供 JavaScript 实现的 C++ 库。V8 提供了创建对象、调用函数等机制。V8 的 API 主要记录在 v8.h 头文件
- libuv:实现 Node.js 事件循环、其工作线程和平台所有异步行为的 C 库。它还充当跨平台抽象库,在所有主要的操作系统上都可以轻松、类似于 POSIX 的访问,例如与文件系统、套接字、定时器、以及系统事件进行交互。
- 内部 Node.js 库。Node.js 自身导出了插件可以使用的 C++ API,其中最重要的是 node::ObjectWrap 类。
Addon开发演化之路
从暴力到 NAN 再到 NAPI 这篇文章详细介绍了Addon的开发方式是如何变迁的。现将其中一些精华内容列出来:
Addon编译生成.node文件,在windows下本质上是 *.dll 的动态链接库。
在 Node.js 中被 require 的时候,是通过 process.dlopen() 对其进行引入的。
node-gyp 在我们编译一个 C++ 原生扩展的时候,它会去指定目录下(通常是 ~/.node-gyp 目录下)搜我们当前 Node.js 版本的头文件和静态连接库文件,若不存在,它就会火急火燎跑去 Node.js 官网下载。
node-gyp 是一个命令行的程序,在安装好后能通过 $ node-gyp 直接运行它。它有一些子命令供大家使用。
- node-gyp configure:通过当前目录的 binding.gyp 生成项目文件,如 Makefile 等;
- node-gyp build:将当前项目进行构建编译,前置操作必须先 configure;
- node-gyp clean:清理生成的构建文件以及输出目录,说白了就是把目录清理了;
- node-gyp rebuild:相当于依次执行了 clean、configure 和 build;
- node-gyp install:手动下载当前版本的 Node.js 的头文件和库文件到对应目录。
node-waf
在 Node.js 0.8 之前,通常在开发 C++ 原生模块的时候,是通过 node-waf 构建的。这个东西使用一种叫 wscript 的文件来配置。
在早期的时候,Node.js 原生 C++ 模块开发方式是非常暴力的,直接使用其提供的原生模块开发头文件。
开发者直接深入到 Node.js 的各种 API,以及 Google V8 的 API。
下面是一个最简单的 echo 函数,返回传进来的参数。用 JavaScript 写相当于是这样的。
1
2
3
4
5
exports.echo = function() {
    if(arguments.length < 1)
        throw new Error("Wrong number of arguments.");
    return arguments[0];
};
在几年前,你的 Node.js C++ 原生扩展代码可能是长这样的。
1
2
3
4
5
6
7
8
9
10
11
12
13
14
15
16
17
18
19
20
Handle<Value> Echo(const Arguments& args)
{
    HandleScope scope;

    if(args.Length() < 1)
    {
        ThrowException(
            Exception::TypeError(
                String::New("Wrong number of arguments.")));
        return scope.Close(Undefined());
    }

    return scope.Close(args[0]);
}

void Init(Handle<Object> exports)
{
    exports->Set(String::NewSymbol("echo"),
        FunctionTemplate::New(Echo)->GetFunction());
}
此时进行 Node.js 原生模块开发,一个版本只能支持特定几个版本的 Node.js,一旦 Node.js 的底层 API 以及 Google V8 的 API 发生变化,而这些原生模块又依赖了变化了的 API 的话,包就作废了。除非包的维护者去支持新版的 API,不过这样依赖,老版 Node.js 下就又无法编译通过新版的包了。
NAN
2013 年年中,NAN出现了,全称 Native Abstractions for Node.js,即 Node.js 原生模块抽象接口。
说 NAN 是 Node.js 原生模块抽象接口可能还是有点抽象,那么讲明白点,它就是一堆宏判断。
此时,大家的C++原生模块代码都差不多长这样。
1
2
3
4
5
6
7
8
9
10
11
12
13
14
15
16
17
#include <nan.h>

void Method(const Nan::FunctionCallbackInfo<v8::Value>& info) {
    info.GetReturnValue().Set(Nan::New("world").ToLocalChecked());
}

void Init(v8::Local<v8::Object> exports) {
    v8::Local<v8::Context> context =
        exports->GetCreationContext().ToLocalChecked();
    exports->Set(context,
                Nan::New("hello").ToLocalChecked(),
                Nan::New<v8::FunctionTemplate>(Method)
                    ->GetFunction(context)
                    .ToLocalChecked());
}

NODE_MODULE(hello, Init)
这样做的好处就是,代码只需要随着 NAN 的升级做改变就好,它会帮你兼容各不同 Node.js 版本,使其在任意版本都能被编译使用。
N-API
自Node.js v8.0.0 发布之后,Node.js 推出了全新的用于开发 C++ 原生模块的接口,N-API。
即使是在 NAN 的开发方式下,一次编写好的代码在不同版本的 Node.js 下也需要重新编译,否则版本不符的话 Node.js 无法正常载入一个 C++ 扩展。即一次编写,到处编译。
而 N-API 相较于 NAPI 来说,它把 Node.js 的所有底层数据结构全部黑盒化,抽象成 N-API 当中的接口。
不同版本的 Node.js 使用同样的接口,这些接口是稳定地 ABI 化的,即应用二进制接口( Application Binary Interface )。这使得在不同 Node.js 下,只要 ABI 的版本号一致,编译好的 C++ 扩展就可以直接使用,而不需要重新编译。
1
2
3
4
5
6
7
8
9
10
11
12
13
14
15
16
17
18
19
20
21
22
23
#include <assert.h>
#include <node_api.h>

static napi_value Method(napi_env env, napi_callback_info info) {
    napi_status status;
    napi_value world;
    status = napi_create_string_utf8(env, "world", 5, &world);
    assert(status == napi_ok);
    return world;
}

#define DECLARE_NAPI_METHOD(name, func)                                        \
{ name, 0, func, 0, 0, 0, napi_default, 0 }

static napi_value Init(napi_env env, napi_value exports) {
    napi_status status;
    napi_property_descriptor desc = DECLARE_NAPI_METHOD("hello", Method);
    status = napi_define_properties(env, exports, 1, &desc);
    assert(status == napi_ok);
    return exports;
}

NAPI_MODULE(NODE_GYP_MODULE_NAME, Init)
node-addon-api
N-API的C++版本,简化了基于 C 的 Node-API 的使用。
1
2
3
4
5
6
7
8
9
10
11
12
13
14
#include <napi.h>

Napi::String Method(const Napi::CallbackInfo& info) {
    Napi::Env env = info.Env();
    return Napi::String::New(env, "world");
}

Napi::Object Init(Napi::Env env, Napi::Object exports) {
    exports.Set(Napi::String::New(env, "hello"),
                Napi::Function::New(env, Method));
    return exports;
}

NODE_API_MODULE(hello, Init)
实例1 Hello World
-
创建文件
hello.cc1 2 3 4 5 6 7 8 9 10 11 12 13 14 15 16 17 18 19 20 21 22 23 24 25
// hello.cc #include <node.h> namespace demo { using v8::FunctionCallbackInfo; using v8::Isolate; using v8::Local; using v8::Object; using v8::String; using v8::Value; void Method(const FunctionCallbackInfo<Value>& args) { Isolate* isolate = args.GetIsolate(); args.GetReturnValue().Set(String::NewFromUtf8( isolate, "world").ToLocalChecked()); } void Initialize(Local<Object> exports) { NODE_SET_METHOD(exports, "hello", Method); } NODE_MODULE(NODE_GYP_MODULE_NAME, Initialize) } // namespace demo所有 Node.js addon都必须导出遵循以下模式的初始化函数:
1
2
     void Initialize(Local<Object> exports);
     NODE_MODULE(NODE_GYP_MODULE_NAME, Initialize)
第二行后面没有分号,NODE_MODULE因为它不是一个函数
module_name必须与最终二进制文件的文件名匹配(不包括.node后缀)。在hello.cc示例中,初始化函数是Initialize ,插件模块名称是addon。
当使用 node-gyp 编译addon时,使用宏NODE_GYP_MODULE_NAME作为NODE_MODULE()的第一个参数,确保最终二进制文件的名称被传递给NODE_MODULE()。
Addon定义的NODE_MODULE()不能同时在多个上下文或多个线程中加载。
-
编译
编写源代码后,必须将其编译成二进制addon.node文件。为此,binding.gyp在项目的顶层创建一个名为binding.gyp的文件,使用类似 JSON 的格式描述模块的构建配置。此文件由node-gyp使用,这是一个专门为编译 Node.js 插件而编写的工具。1 2 3 4 5 6 7 8
{ "targets": [ { "target_name": "addon", "sources": [ "hello.cc" ] } ] }binding.gyp创建文件后,使用
node-gyp configure为当前平台生成适当的项目构建文件。这将在目录中生成Makefile(在 Unix 平台上) 或vcxproj文件 (在 Windows 上) build/。接下来,调用
node-gyp build命令生成编译后的addon.node文件。这将被放入build/Release/目录中。 -
一旦build完成,就可以使用
require()在 Node.js 内部调用addon.node模块。.node通常可以省略扩展名,Node.js 仍会找到并初始化插件:1 2 3 4 5
// hello.js const addon = require('./build/Release/addon'); console.log(addon.hello()); // Prints: 'world'
实例2 Calculate
- 创建一个文件夹,初始化project
npm init -
新建文件
binding.gyp1 2 3 4 5 6 7 8
{ "targets":[ { "target_name":"calculate", "sources":["calculate.cc"] } ] } -
新建
calculate.cc1 2 3 4 5 6 7 8 9 10 11 12 13 14 15 16 17 18 19 20 21 22 23 24 25
#include <node.h> namespace calculate { using v8::FunctionCallbackInfo; using v8::Isolate; using v8::Local; using v8::Object; using v8::Number; using v8::Value; void Method(const FunctionCallbackInfo<Value>& args){ Isolate* isolate = args.GetIsolate(); int i; double x = 100.734659, y=353.2313423423432; for(i=0; i< 1000000000; i++){ x += y; } auto total = Number::New(isolate, x); args.GetReturnValue().Set(total); } void Initialize(Local<Object> exports) { NODE_SET_METHOD(exports, "calc", Method); } NODE_MODULE(NODE_GYP_MODULE_NAME, Initialize); } - 运行命令行
node-gyp configure进行配置 - 运行命令行
node-gyp build生成node文件 -
新建
index.js,调用node文件1 2 3
const calculate = require('./build/Release/calculate') console.log(calculate.calc()); -
运行命令行
node index.js,输出如下结果1
353231342267.2897
Node-API
Node-API 是用于构建native addon的 API。它独立于底层 JavaScript 运行时(例如 V8),并作为 Node.js 本身的一部分进行维护。此 API 将在 Node.js 的各个版本中保持稳定的应用程序二进制接口 (ABI)。它旨在使插件免受底层 JavaScript 引擎的变化的影响,并允许为一个版本编译的模块在更高版本的 Node.js 上运行而无需重新编译。插件同样使用node-gyp进行构建/打包,唯一的区别是使用的 API 函数集。不使用 V8 或Native Abstractions for Node.js(nan) APIs,而是使用 Node-API 中可用的函数。
要在上述“Hello world”示例中使用 Node-API,请将hello.cc的内容替换为以下内容。所有其他说明保持不变。
1
2
3
4
5
6
7
8
9
10
11
12
13
14
15
16
17
18
19
20
21
22
23
24
25
26
27
28
29
// hello.cc using Node-API
#include <node_api.h>

namespace demo {

    napi_value Method(napi_env env, napi_callback_info args) {
        napi_value greeting;
        napi_status status;

        status = napi_create_string_utf8(env, "world", NAPI_AUTO_LENGTH, &greeting);
        if (status != napi_ok) return nullptr;
        return greeting;
    }

    napi_value init(napi_env env, napi_value exports) {
        napi_status status;
        napi_value fn;

        status = napi_create_function(env, nullptr, 0, Method, nullptr, &fn);
        if (status != napi_ok) return nullptr;

        status = napi_set_named_property(env, exports, "hello", fn);
        if (status != napi_ok) return nullptr;
        return exports;
    }

    NAPI_MODULE(NODE_GYP_MODULE_NAME, init)

}  // namespace demo
实例1 getScreenSize
-
prerequisite addon 需要c++编译环境,可以装Visual Studio c++,或者只装个C++编译器也行。
需要全局安装node-gyp1 2 3
npm install --global --production windows-build-tools //管理员运行, 如果安装过python 以及c++开发软件就不需要装这个了 npm install node-gyp -g #全局安装
-
创建新项目
1
2
 mkdir my-node-addon
 cd my-node-addon
-
初始化项目
1
 npm init -y
-
安装
node-addon-api1
npm install node-addon-api -D
- 在 src 目录下创建一个cpp文件,例如 index.cpp
-
在 index.cpp 文件中,使用 node-addon-api 的 API 来编写你的 C++ 代码
1 2 3 4 5 6 7 8 9 10 11 12 13 14 15 16 17 18 19 20 21 22 23 24 25
#define NAPI_VERSION 3 //指定addon版本 #define NAPI_CPP_EXCEPTIONS //启用 Node.js N-API 中的 C++ 异常支持 #include <napi.h> //addon API #include <windows.h> //windwos API Napi::Value GetScreenSize(const Napi::CallbackInfo& info) { Napi::Env env = info.Env(); //指定环境 int cx = GetSystemMetrics(SM_CXSCREEN); //获取设备宽 int cy = GetSystemMetrics(SM_CYSCREEN); //获取设备高 Napi::Object result = Napi::Object::New(env); //创建一个对象 result.Set("width", cx); result.Set("height", cy); return result; //返回对象 } Napi::Object Init(Napi::Env env, Napi::Object exports) { //抛出一个函数 getScreenSize exports.Set("getScreenSize", Napi::Function::New(env, GetScreenSize)); return exports; } //addon固定语法 必须抛出这个方法 NODE_API_MODULE(NODE_GYP_MODULE_NAME, Init) -
创建编译配置文件
binding.gyp, 在binding.gyp文件中定义你的 API:1 2 3 4 5 6 7 8 9 10 11
{ "targets":[ { "target_name": "cpu", "sources": [ "index.cpp" ], "include_dirs": [ "<!@(node -p \"require('node-addon-api').include\")" ] } ] } -
执行以下命令进行node编译
1
2
 node-gyp configure #生成配置文件
 node-gyp build  #打包addon
-
创建js文件
index.js,引用编译好的node文件1 2
const addon = require('./build/Release/cpu.node') console.log(addon.getScreenSize()) -
运行js文件
1
 node index.js
输出如下
1
 { width: 1536, height: 864 }
Node.js v19.0.1 documentation
node-addon-examples
Node.js v18.11.0 文档
探索 Node.js 与 C++ 的绑定:使用 node-addon-api
从暴力到 NAN 再到 NAPI——Node.js 原生模块开发方式变迁
使用node-addon-api编写c/c++扩展(传递复杂对象)
Node-API Resource
Node-API Media
Nodejs 第五十七章(addon)
Node.js C++ Addon应用实践
REST API Server
Reference
Express 官网
带你入门nodejs第三天——express路由