Angular 框架为我们提供了三大工具,帮助我们更愉快地编写和运行单元测试:
Jasmine:一款主流的测试框架。
Karma:一款主流的单元测试执行引擎。
Angular testing utilities:一个工具类,增强在 Angular 框架下,编写单元测试的体验。
在使用 Angular CLI 创建项目的同时,单元测试环境也已经配置好了,可以直接编写单元测试。运行命令 ng test 运行所有测试。
Anglar CLI 会自动生成 Jasmine 和 Karma 的配置文件。
Karma 的配置文件是 karma.conf.js,可以配置各种插件,测试文件的位置,测试覆盖测量工具,报表形式,以及指定不同的浏览器运行测试。
Angular 测试工具类帮助我们创建编写单元测试的环境,主要包括 TestBed 类和各种助手方法,都位于 @angular/core/testing 名称空间下。
TestBed 类是一个很重要的概念,他会创建一个测试模块,模拟一个正常的 Angular 模块的行为。我们可以通过 configureTestingModule 方法配置这个测试模块。
测试文件的扩展名必须是 .spec.ts,这样工具才能识别出它是一个测试文件,也叫规约(spec)文件。
创建测试工程
创建一个新的Angular工程
1
ng new UnittestDemo
运行单元测试:
1
ng test
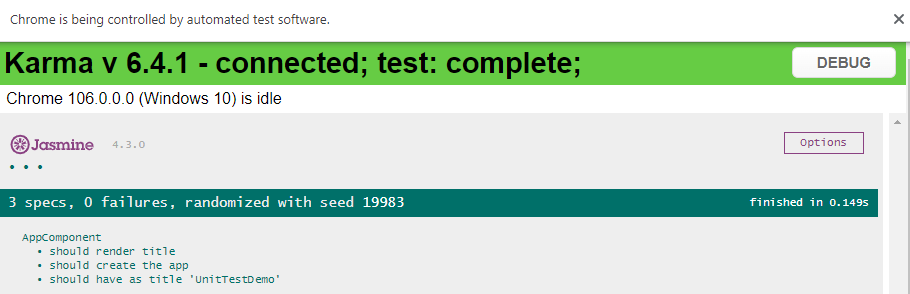
在命令行中会有如下输出:
 Chrome会被调起:
调式单元测试代码
如果测试没能如预期般工作,可以在浏览器中查看和调试它们。在浏览器中调试这些测试规约的方式与调试应用时相同。
- 打开 Karma 的浏览器窗口,单击
DEBUG按钮;它会打开一个新的浏览器选项卡并重新运行测试。 - 打开浏览器的 “Developer Tools”(Ctrl-Shift-I 或 F12)选择 “sources” 页。
- Ctrl+P, 打开
app.component.spec.ts测试文件 - 在测试中设置一个断点。
- 刷新浏览器,它会在这个断点处停下来。
Coverage
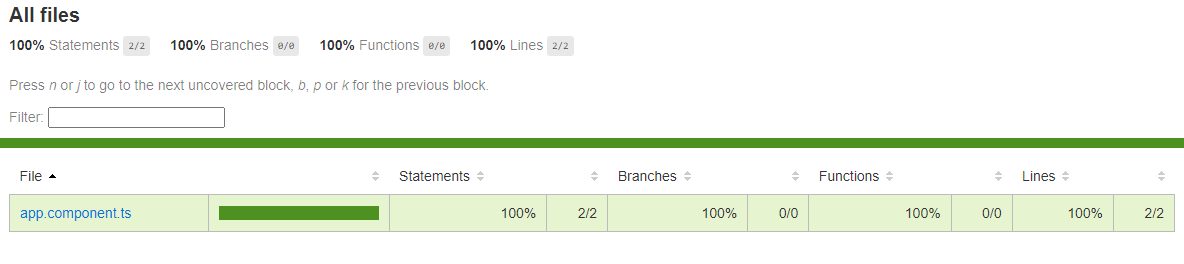
要生成覆盖率报告,请在项目的根目录下运行以下命令。
1
ng test --no-watch --code-coverage
测试完成后,该命令会在项目根目录下创建一个 coverage 文件夹。打开 index.html 文件,可以查看带有源代码和代码覆盖率值的报表。
 如果要在每次测试时都创建代码覆盖率报告,可以在 CLI 配置文件 angular.json 中设置以下选项:
1
2
3
4
5
"test": {
    "options": {
        "codeCoverage": true
    }
}
在算覆盖率的时候如果想排除掉某些文件:
1
2
3
4
5
6
7
"test": {
    "options": {
        "codeCoverageExclude": [
            "src/assets/**"
        ]
    }
}
Jasmine
Angular 使用了Jasmine测试框架,打开app.component.spec.ts, 已经创建好了三个测试用例
1
2
3
4
5
6
7
8
9
10
11
12
13
14
15
16
17
18
19
20
21
22
23
24
25
26
27
28
describe('AppComponent', () => {
    beforeEach(async () => {
        await TestBed.configureTestingModule({
        declarations: [
            AppComponent
        ],
        }).compileComponents();
    });

    it('should create the app', () => {
        const fixture = TestBed.createComponent(AppComponent);
        const app = fixture.componentInstance;
        expect(app).toBeTruthy();
    });

    it(`should have as title 'UnitTestDemo'`, () => {
        const fixture = TestBed.createComponent(AppComponent);
        const app = fixture.componentInstance;
        expect(app.title).toEqual('UnitTestDemo');
    });

    it('should render title', () => {
        const fixture = TestBed.createComponent(AppComponent);
        fixture.detectChanges();
        const compiled = fixture.nativeElement as HTMLElement;
        expect(compiled.querySelector('.content span')?.textContent).toContain('UnitTestDemo app is running!');
    });
});
describe 用于对测试进行分组,通常每个测试文件在顶层都有一个。字符串参数'AppComponent'用于命名测试集合。这有助于在大型产品中查找相应的测试。
it 单元测试函数,就像 describe 一样,它需要一个字符串和一个函数。字符串是标题,函数是具体的测试。一个单元测试可以包含一个或多个expect。
expect是对或错的断言。它接受一个值,称为实际值,与预期值进行比较。
beforeEach
beforeEach、afterEach、beforeAll 和 afterAll 函数
顾名思义,beforeEach 函数在每个单元测试执行之前被调用一次, 调用 beforeEach() 来为每一个 it() 测试设置前置条件
afterEach 在每个测试之后调用一次.
beforeAll 在 describe 中的所有测试运行之前,该函数仅被调用一次
afterAll 在所有测试完成后调用
测试一个服务
使用以下命令生成一个新的service
1
ng g service services/MsgService
打开自动创建的单元测试文件msg-service.service.spec.ts:
1
2
3
4
5
6
7
8
9
10
11
12
13
14
15
import { TestBed } from '@angular/core/testing';
import { MsgServiceService } from './msg-service.service';

describe('MsgServiceService', () => {
    let service: MsgServiceService;

    beforeEach(() => {
        TestBed.configureTestingModule({});
        service = TestBed.inject(MsgServiceService);
    });

    it('should be created', () => {
        expect(service).toBeTruthy();
    });
});
TestBed 是 Angular 测试中最重要的工具。TestBed 创建了一个动态构造的 Angular 测试模块,用来模拟一个 Angular 的 @NgModule。
TestBed.configureTestingModule() 方法接受一个元数据对象,它可以拥有@NgModule的大部分属性。
要测试某个服务,你可以在元数据属性 providers 中设置一个要测试或模拟的服务数组。然后将服务类作为参数调用 TestBed.inject(),将它注入到测试中。
1
2
3
4
5
let service: MsgServiceService;
beforeEach(() => {
    TestBed.configureTestingModule({ providers: [MsgServiceService] });
    service = TestBed.inject(MsgServiceService);
});
我们在msg-service.service.ts里添加一个新的函数
1
2
3
public GetMessage():string{
    return 'This is message from services';
}
针对这个新函数写一个新的测试:
1
2
3
it('call GetMessage', () => {
    expect(service.GetMessage()).toContain('message from services');
});
测试一个组件
我们回到app.component.spec.ts,根组件就是一个最基本的组件,它不仅仅是个类,还会与 DOM 以及其他组件进行交互。我们可以像写服务的测试一样写一些针对function的测试,但它们无法告诉你这个组件是否能正确渲染、响应用户输入和手势,或是集成到它的父组件和子组件中。
生成一个新的component:
1
ng g c components/news
修改app.component.html,清空默认的demo html,添加news组件。 清空app.component.sepc.ts里的单元测试。
如果在此时重新跑单元测试,你可能会注意到出现以下提示:
1
ERROR: 'NG0304: 'app-news' is not a known element (used in the 'AppComponent' component template):
当我们往app.component.html里添加News组件的时候,单元测试app.component.spec.ts里也要添加相应的组件,添加NewsComponent之后错误提示消失
1
2
3
4
5
6
7
8
beforeEach(async () => {
    await TestBed.configureTestingModule({
    declarations: [
        AppComponent,
        NewsComponent
    ],
    }).compileComponents();
});
打开news自动生成的测试文件:
1
2
3
4
5
6
7
8
9
10
11
12
13
14
15
16
17
18
19
20
21
22
import { ComponentFixture, TestBed } from '@angular/core/testing';
import { NewsComponent } from './news.component';

describe('NewsComponent', () => {
    let component: NewsComponent;
    let fixture: ComponentFixture<NewsComponent>;

    beforeEach(async () => {
        await TestBed.configureTestingModule({
        declarations: [ NewsComponent ]
        })
        .compileComponents();

        fixture = TestBed.createComponent(NewsComponent);
        component = fixture.componentInstance;
        fixture.detectChanges();
    });

    it('should create', () => {
        expect(component).toBeTruthy();
    });
});
相比于service的测试,会发现写法不一样了,组件需要用createCompnent来创建,并且多了几个新的关键词ComponentFixture,detectChanges
ComponentFixture
ComponentFixture 是一个测试夹具,用于与所创建的组件及其对应的元素进行交互。
可以通过测试夹具(fixture)访问组件实例,并用 expect 断言来确认它是否存在.
1
2
3
it('should create', () => {
    expect(component).toBeTruthy();
});
ComponnetFixture.nativeElement能获取到页面DOM元素.
在html中新加 h1 title
1
<h1>{ {title} }</h1>
ts文件:
1
public title:string='original title';
测试中可以通过nativeElement来获取h1
1
2
3
4
5
6
7
8
9
10
11
12
13
14
15
16
17
18
19
let component: NewsComponent;
let fixture: ComponentFixture<NewsComponent>;
let h1:HTMLElement;

beforeEach(async () => {
    await TestBed.configureTestingModule({
    declarations: [ NewsComponent ]
    })
    .compileComponents();

    fixture = TestBed.createComponent(NewsComponent);
    component = fixture.componentInstance;
    h1 = fixture.nativeElement.querySelector('h1');
    fixture.detectChanges();
});

it('Should display title', ()=>{
    expect(h1.textContent).toContain(component.title);
})
detectChanges
在生产环境中,当 Angular 创建一个组件,或者用户输入按键,或者异步活动(比如 AJAX)完成时,就会自动进行变更检测。 但是 TestBed.createComponent 不会触发变化检测。必须通过调用 fixture.detectChanges() 来告诉 TestBed 执行数据绑定。
1
2
3
4
5
6
7
8
9
10
11
it('Should still display original title', ()=>{
    let originTitle =component.title;
    component.title='Changed title';
    expect(h1.textContent).toContain(originTitle);
})

it('Should display new title after detectChanges', ()=>{
    component.title='Changed title';
    fixture.detectChanges();
    expect(h1.textContent).toContain('Changed title');
})
自动变更检测
可以通过配置带有 ComponentFixtureAutoDetect 提供者的 TestBed 来让 Angular 测试环境自动运行变更检测。
1
2
3
4
5
6
7
8
import { ComponentFixtureAutoDetect } from '@angular/core/testing';
await TestBed.configureTestingModule({
  declarations: [ NewsComponent ],
  providers: [
    { provide: ComponentFixtureAutoDetect, useValue: true }
  ]
})
.compileComponents();
ComponentFixtureAutoDetect 服务会响应异步活动,比如 Promise、定时器和 DOM 事件。但无法检测到对组件属性的直接同步更新。因此测试还是要调用fixture.detectChanges() 来触发另一个变更检测周期。
1
2
3
4
5
it('Should display new title after detectChanges', ()=>{
    component.title='Changed title';    // Change property directly
    fixture.detectChanges();            // Call detectChange manually
    expect(h1.textContent).toContain('Changed title');
})
具有依赖的组件
组件通常都有服务依赖。
在News html中新加一个h2
1
<h2>{ {msg} }</h2>
ts文件中新加一个服务引用:
1
2
3
4
5
6
7
import { MsgServiceService } from 'src/app/services/msg-service.service';

public msg:string='';
constructor(private msgService:MsgServiceService) { }
ngOnInit(): void {
    this.msg = this.msgService.GetMessage();
}
修改一下Msgservice:
1
2
3
4
5
6
7
8
9
export class MsgServiceService {

    public msg:string='This is message from services'
    constructor() { }

    public GetMessage():string{
        return this.msg;
    }
}
在写单元测试时,我们不必注入真正的服务。而是使用服务的替身(stubs,fakes,spies 或 mocks)。News组件的单元测试是为了测试News组件,而不是它引用的服务。
下面的示例中添加了一个Stub,模拟MsgServiceService的功能,在配置TestBed的时候,通过provider来告诉测试使用stub
1
2
3
4
5
6
7
8
9
10
11
12
13
14
15
16
17
18
19
20
21
22
23
24
25
26
27
28
29
30
31
32
33
let msgService:MsgServiceService;
let msgServiceStub:Partial<MsgServiceService>;

beforeEach(async () => {
    msgServiceStub = {
        msg:'This is test message',
        GetMessage():string {
            return this.msg!;
        },
    }

    await TestBed.configureTestingModule({
        declarations: [ NewsComponent ],
        providers: [{provide: MsgServiceService, useValue: msgServiceStub}]

    })
    .compileComponents();

    fixture = TestBed.createComponent(NewsComponent);
    component = fixture.componentInstance;
    msgService = TestBed.inject(MsgServiceService);
    h2 = fixture.nativeElement.querySelector('h2');
    fixture.detectChanges();
});
it('Should show test message from stub service',()=>{
    expect(h2.textContent).toContain(msgServiceStub.msg);
})
it('Should show test message from stub service 2',()=>{
    msgServiceStub.msg = 'abc';
    component.ngOnInit();
    fixture.detectChanges();
    expect(h2.textContent).toContain('abc');
})
也可以写一个Mock Service,当使用MsgServiceService时,会自动调用MockMsgService。注意provide里用的是useClass,而不是useValue
1
2
3
4
5
6
7
8
9
10
11
12
13
14
15
16
17
18
19
20
21
22
23
24
25
26
27
28
29
30
31
32
33
class MockMsgService{
    msg ='This is mock test message';
    GetMessage():string {
        return this.msg;
    }
}

describe('NewsComponent Mock msgService', () => {
    let component: NewsComponent;
    let msgService:MsgServiceService;
    beforeEach(async () => {
        await TestBed.configureTestingModule({
            providers: [
                NewsComponent,
                {provide: MsgServiceService, useClass: MockMsgService}
            ]
        }).compileComponents();

        component = TestBed.inject(NewsComponent);
        msgService = TestBed.inject(MsgServiceService);
    });

    it('Use mock msgService in ngOnnit()', () => {
        component.ngOnInit();
        expect(component.msg).toContain('This is mock test message');
    });

    it('Change mock msgService value', () => {
        msgService.msg='abc';
        component.ngOnInit();
        expect(component.msg).toContain('abc');
    });
})
带异步服务的组件
如果组件调用的是异步服务,在写测试的时候更麻烦些
新建一个component
1
ng g c asyncnews
html:
1
<h3>{ {asyncMsg | async} }</h3>
asyncnews.component.ts
1
2
3
4
5
6
7
8
9
10
11
12
13
14
export class AsyncnewsComponent implements OnInit {
    public asyncMsg!:Observable<string>;
    constructor(private asyncmsgService:AsyncmsgService) { }

    ngOnInit(): void {
        this.getAsyncMsg();
    }

    getAsyncMsg():void{
        this.asyncMsg = this.asyncmsgService.GetAsyncMessage().pipe(
            startWith('loading...')
        );
    }
}
新建一个异步服务
1
ng g service services/asyncmsg
添加异步函数
1
2
3
public GetAsyncMessage():Observable<string>{
    return of('This is async message from async message service.').pipe(delay(3000));
}
app.component.html 里引入component
1
<app-asyncnews></app-asyncnews>
页面新加载时显示loading…,过三秒之后显示从service里拿到的异步信息.
使用spy进行异步测试
1
2
3
4
5
6
7
8
9
10
11
12
13
14
15
16
17
18
19
20
21
22
23
24
25
26
describe('AsyncnewsComponent', () => {
    let component: AsyncnewsComponent;
    let fixture: ComponentFixture < AsyncnewsComponent > ;
    let msgAsyncServiceSpy: jasmine.Spy;
    let asyTestMsg: string;
    let h3: HTMLElement;

    beforeEach(async () => {
        asyTestMsg = 'test async message';
        const msgServiceSpy = jasmine.createSpyObj('AsyncmsgService', ['GetAsyncMessage']);
        msgAsyncServiceSpy = msgServiceSpy.GetAsyncMessage.and.returnValue( of (asyTestMsg));

        await TestBed.configureTestingModule({
            declarations: [AsyncnewsComponent],
            providers: [{
            provide: AsyncmsgService, useValue: msgServiceSpy
            }]
        })
        .compileComponents();

        fixture = TestBed.createComponent(AsyncnewsComponent);
        component = fixture.componentInstance;
        h3 = fixture.nativeElement.querySelector('h3');
        fixture.detectChanges();
    });
});
spy设计目标是让所有对 GetAsyncMessage 的调用都会收到一个带有测试asyTestMsg的可观察对象。与真正的 GetAsyncMessage() 方法不同,这个spy会绕过异步服务,并立即返回asyTestMsg的Observable对象。虽然这个 Observable 是同步的,但你也可以用它来编写很多有用的测试。
1
spy = spyOn(truService, 'isAuthenticated').and.returnValue(false);
Mock vs spy
Mock对象完全替换原先的类,返回记录或默认值。 可以“凭空”创建模拟。 这是单元测试期间最常用的。
spy是获取现有对象并仅“替换”某些方法。 如果有一个庞大的类并且只想模拟某些方法(部分模拟)时,这很有用。
done()
done()是Jasmine提供的异步测试方法:
1
2
3
4
5
6
7
8
9
10
11
it('test',(done)=>{
    fixture.detectChanges();
    let spy=spyOn(authService, 'isAuthenticated').and.returnValue(Promise);
    component.ngOnit();

    spy.calls.mostRecent().returnValue.then(()=>{
        fixture.detectChanges();
        expected...
        done();
    })
})
同步测试
同步测试的一个关键优势是,你通常可以把异步过程转换成同步测试。
当spy的结果返回时,GetAsyncMessage() 方法会在第一个变更检测周期(即调用ngOnInit时)后立即更新屏幕上的消息。
1
2
3
4
5
6
7
8
9
describe('when test with synchronous observable', () => {
    it('should show msg after component initialized', () => {
        fixture.detectChanges();
        expect(h3.textContent).toBe(asyTestMsg);
        expect(msgAsyncServiceSpy.calls.any())
            .withContext('msgServiceSpy called')
            .toBe(true);
    });
})
fakeAsync()
要使用 fakeAsync() 功能,需要在测试的环境设置文件中导入 zone.js/testing。Angular CLI 在创建项目的时候,已经在src/test.ts 中配置好了 zone-testing。
上述的同步测试只是测试了最终的结果,真实的服务并不是这样工作的。真实的服务会向远程服务器发送请求。服务器需要一定的时间才能做出响应,并且其响应体肯定不会像前面的同步测试一样是立即可用的。
如果能从spy中返回一个异步的observable,测试就会更真实地反映真实的情况。
1
msgAsyncServiceSpy.and.returnValue(asyncData(asyTestMsg));
异步的observable对象可以由asyncData 生成。这里直接使用了Angular提供的代码示例。
async-observable-helpers.ts
1
2
3
4
import { defer, delay } from 'rxjs';
export function asyncData<T>(data: T) {
    return defer(() => Promise.resolve(data));
}
这个函数返回的异步的observable对象会在 JavaScript 引擎的下一个周期中发送 data 值。
defer()操作符返回一个observable。它的参数是一个返回 Promise 或可观察对象的工厂函数。当某个订阅者订阅 defer 生成的observable时,defer 就会调用此工厂函数生成新的observable,并让该订阅者订阅这个新对象。
defer() 操作符会把 Promise.resolve() 转换成一个新的observable,它和 HttpClient 一样只会发送一次然后立即结束(complete)。这样,当订阅者收到数据后就会自动取消订阅。
1
2
3
4
5
6
7
8
9
10
11
12
13
14
15
16
17
18
describe('when test with async observable', () => {
    beforeEach(() => {
        msgAsyncServiceSpy.and.returnValue(asyncData(asyTestMsg));
    });

    it('should show async msg after GetAsyncMessage (fakeAsync)', fakeAsync(() => {
        component.ngOnInit();
        fixture.detectChanges();
        expect(h3.textContent)
            .withContext('should show placeholder')
            .toBe('loading...');
        tick();
        fixture.detectChanges();
        expect(h3.textContent)
            .withContext('should show async msg')
            .toBe(asyTestMsg);
    }));
})
tick() 函数
tick() 函数用来来推进(虚拟)时钟。是 Angular 测试工具函数之一。它是 fakeAsync()的伴生工具,只能在 fakeAsync() 测试体内调用它。
tick() 函数接受毫秒数(milliseconds) 和 tick 选项(tickOptions) 作为参数,毫秒数(默认值为 0)参数表示虚拟时钟要前进多少。比如,如果你在 fakeAsync() 测试中有一个 setTimeout(fn, 100),你就需要使用 tick(100) 来触发其 fn 回调。
waitForAsync()
要使用 waitForAsync() 函数,需要在测试的环境设置文件中导入zone.js/testing。Angular CLI 在创建项目的时候,已经在src/test.ts 中配置好了 zone-testing。
用 waitForAsync() 函数重写之前的 fakeAsync() 测试,。
1
2
3
4
5
6
7
8
9
10
11
12
it('should show async msg after GetAsyncMessage (waitForAsync)', waitForAsync(() => {
  component.ngOnInit(); // ngOnInit()
  fixture.detectChanges();
  expect(h3.textContent)
    .withContext('should show placeholder')
    .toBe('loading...');

  fixture.whenStable().then(() => { // wait for async GetAsyncMessage
    fixture.detectChanges(); // update view with async msg
    expect(h3.textContent).toBe(asyTestMsg);
  });
}));
whenStable
测试里并没有调用 tick(),而是调用了 fixture.whenStable()。fixture.whenStable() 返回一个 Promise, 测试会在该 Promise 的回调中继续进行。
测试管道
可以在没有 Angular 测试工具的情况下测试管道。
title-case.pipe.ts:
1
2
3
4
5
6
7
8
9
10
import { Pipe, PipeTransform } from '@angular/core';

@Pipe({name: 'titlecase', pure: true})
/** Transform to Title Case: uppercase the first letter of the words in a string. */
export class TitleCasePipe implements PipeTransform {
    transform(input: string): string {
        return input.length === 0 ? '' :
        input.replace(/\w\S*/g, (txt => txt[0].toUpperCase() + txt.slice(1).toLowerCase() ));
    }
}
title-case.pipe.spec.ts:
1
2
3
4
5
6
7
8
9
10
11
12
13
14
describe('TitleCasePipe', () => {
    // This pipe is a pure, stateless function so no need for BeforeEach
    const pipe = new TitleCasePipe();

    it('transforms "abc" to "Abc"', () => {
        expect(pipe.transform('abc')).toBe('Abc');
    });

    it('transforms "abc def" to "Abc Def"', () => {
        expect(pipe.transform('abc def')).toBe('Abc Def');
    });

    // ... more tests ...
});
测试http.get/post
Source code:
1
2
3
4
5
6
7
8
9
10
11
12
13
public login(username: string, password: string) {
    return this.http
        .post('http://localhost/login', { username: username, password: password })
        .pipe(
            map((response) => {
                // login successful if there's a jwt token in the response
                const serverResponse = response;
                if (serverResponse && serverResponse['token']) {
                    this.handleToken(serverResponse['token']);
                }
            })
        );
}
单元测试需要用到HttpClientTestingModule和HttpTestingController:
1
2
3
4
5
6
7
8
9
10
11
12
13
14
15
16
17
18
19
20
21
22
23
24
25
26
27
28
29
30
31
32
33
34
describe('AuthenticationService', () => {
    let service: AuthenticationService;
    let httpTestingController:HttpTestingController;

    beforeEach(() => {
        TestBed.configureTestingModule({
            imports: [HttpClientTestingModule],
            providers: [AuthenticationService]
        });
        httpTestingController = TestBed.inject(HttpTestingController);
        service = TestBed.inject(AuthenticationService);
    });

    afterEach(()=>{
        httpTestingController.verify();
    })

    it('login', ()=>{
        const userName='test user name';
        const password = 'test password';
        const mockLoginResponse = {token:'This is test reponse token'};
        spyOn(service, 'handleToken');

        service.login(userName, password)
            .subscribe(()=>{
                expect(service.handleToken).toHaveBeenCalled();
            });

        const req = httpTestingController.expectOne('http://localhost/login')
        expect(req.request.method).toEqual('POST');
        expect(req.request.body).toEqual({'username':userName, 'password':password});
        req.flush(mockLoginResponse);
    })
})
spy on private property/function
1
2
3
4
private socket;
private testFun(){
    ...
}
unit test:
1
2
3
4
service['socket'];
spyOn<any>(service, 'testFun');

expect(service['testFun']).toHaveBeenCalled();
Reference
Angular测试
Jasmine
Testing with Mocks & Spies
Angular: From Theory To Practice
Testing Angular Components with Stub Services and Spies in Jasmine
Angular 单元测试简介
聊聊Angular中的单元测试